Constructing the Speed Vest circuit board
The electronic circuitry for the Speed Vest is fairly simple. A high-voltage, low ampere power supply lights up strands of electroluminescent (EL) wire. Each wire corresponds to a digit on either the left or right side of the vest. We use a microcontroller, the Arduino Duemilanove, to read input from the wired wheel sensor, calculate the speed, and determine which digit to light up.
The Arduino itself cannot supply enough power to light up the EL wire. For that, we use a power supply provided by Coolight, the makers of the EL wire. The Arduino can output small voltages that are used to control triacs, which are basically fancy transistors. When the Arduino applies the proper voltage to the gate of the triac, the EL power supply connects to the wire and that digit lights up.
This is a picture of the Arduino Duemilanove board I’m using:
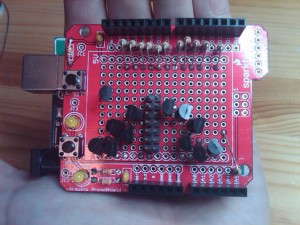
The Arduino is one of the most popular open-source microcontroller boards available, and has a number of add-ons available. There are quite a few circuitboards that plug into the black header pins visible in the upper and bottom right, allowing you to easily add components. For this project we are using the ProtoShield. Here is a picture of it sitting on top of the Arduino board, with the triacs, resistors, and ribbon cable header soldered in:
As you can see from the included hand, this is not very big! Getting all of those triacs in place, and connecting 3 pins from each one to ground, output pin, and ribbon cable header was not easy. Although things look pretty neat on top, the underside is another story. This was the first time I’d soldered in years, and it showed. A few things I learned:
- Use leaded solder. Don’t be environmentally correct and use the lead-free stuff. Not only will you pay a lot more and have to special order it, it doesn’t work. Just go to Radio Shack and pick up a spool of the standard stuff.
- If you have a small space like this, use a sharp conical tip for the soldering iron, not the standard wedge-shaped one. Otherwise you are likely to burn surrounding wires. You can see a few char marks in my work.
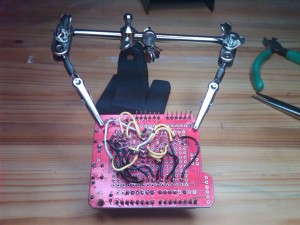
In the original Speed Vest article, the author mentioned simply bending down leads rather than connecting point-to-point with insulated wire. Although I was able to do this for most of the ground connections, it was not possible to do it for the others while keeping the necessary electrical isolation. So I ended up with this:
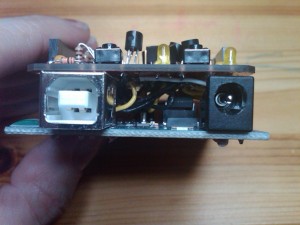
As you can see, darn ugly. It looked somewhat better before I fit the boards together. They need to fit together snugly, so there is not much room for the wires to loop neatly above each other, as they did before. Here is a side view of the Arduino and ProtoShield hooked together — not much room.
I made a few changes to the original Speed Vest schematics. The Arduino has 14 digital output pins. D3, an interrupt, is used by the wheel sensor. I want to make the next version of Speed Vest wireless. My initial research into this suggests that I should reserve pins D0 and D1 as well, as those are used for hardware serial connections. And I am considering adding extra digits to the original design. Fortunately, the Arduino also has 6 analog pins, and they can be used as digital pins too. This allows 12 digits to be powered easily, although this affected the symmetry of my wiring and made it more difficult to place all of the components. Right now I am using the specified 14 pin ribbon cable header — and frankly, I will never unsolder that, reconnecting everything would be too painful — but it would be fairly easy to limit the power supply to one pin instead of two, allowing me to add one more speed digit. That would allow for 0-9 on the right side and 1-3 on the left, as much as I would ever need.


[…] heart of the Speed Vest is the Arduino Duemilanove board, as shown in an earlier post. A ribbon cable runs from the Arduino to the cloth in the vest. The board is hard-wired to a 9V […]
[…] to switch high voltage, AC power. For that project I blindly followed the authors’ design and soldered 13 triacs in point-to-point wiring on an Arduino shield. That was not an experience I wanted to […]