Learning to use heat-shrink wrap
With the ProtoShield wired up and the ribbon cable prepared, the next step for the Speed Vest was attaching the electroluminescent wires to individual strands of the cable. This was rather fun as it was my first chance to try something I’d been interested in for a while, heat-shrink wrapping.
I paid my Coolight, my EL wire supplier, to solder leads onto the wires for me, as I wasn’t enthusiastic about doing that and EL wire can be a bit fragile. At $3 per strand this was a noticeable addition to the total cost, so other people might want to do it themselves — it didn’t look too difficult. Coolight also added a connector to allow the wire to plug into its power supply. Not only that, but I had ordered just one power supply, since my design only calls for lighting 2 strands at a time. Coolight must have thought I made a mistake, because they went ahead and sent me 12 power supplies without any extra charge. Nice of them.
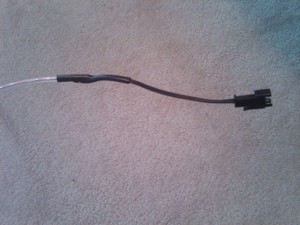
As shipped, the EL wire looked like this:
The connector is on the right, and the pink EL wire is on the left. In order to expose the two wire leads, the first thing I had to do was cut off the connector. As funny as this will sound to an experienced maker, I hesitated. Here I was about to deliberately destroy something that was working! And cutting the wires of an electrical device, no less, which we are all trained to avoid doing as children. But soon enough I took out the wire cutters, snipped off the connectors, and stripped the leads.
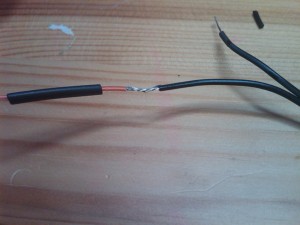
One end of the ribbon cable had no connector, so with some effort one can pull the individual conducting wires away from its neighbors on the side. I stripped off the insulation, slipped a black sleeve of heat-shrink tubing on the wire to the left, and twisted the wires together. Then I applied a thin layer of solder to the metal.
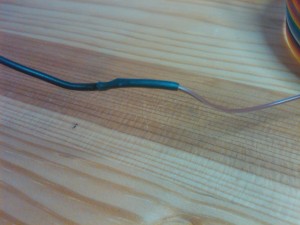
As you can see, this doesn’t look like a very strong joint. Solder will not withstand a great deal of pressure, and the conducting elements are exposed. To fix this, we use the heat-shrink tube. After soldering, the tube was slid from the wire on the left to cover the joint. A hair dryer was used to heat the tube, making it contract to 50% of its diameter and forming a nice seal around the joint as shown below:
This is a simple, cheap method of protecting your work and making it look a lot more professional.


[…] jacket rather than a computer at the top of the stem. It is a greater distance. So I broke out the heat shrink tubing and went to town. I have a 100′ spool of the stuff lying around — it was such a great […]