Finishing touches for the Speed Vest
With the electronics complete, there were only a few steps left to finish the Speed Vest. The digits had been sewn into a large piece of black denim cloth. It was now time to put this in a more attractive shape. After some consideration I decided to go with a trapezoid, as the original authors did. I wanted something that could be used without being attached to a jacket. It’s warm here now, and permanently attaching the Speed Vest to a jacket would limit its usefulness.
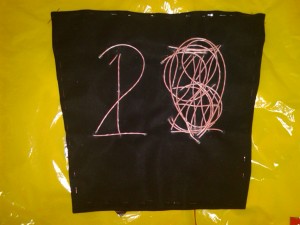
Since I don’t own a sewing machine, a friend of mine — Sherri — kindly offered to do the final stitching. But I had to pin the cloth into the proper shape for her. This took a surprisingly long time to do right. I quickly figured out that doing it “by eye” looked pretty awful. A template didn’t work too well either. In the end, I determined the bisecting line, then did precise measurements out from that to each edge. After a lot of pinning and repinning, the vest looked pretty decent:
Another small item, the wires for the wheel sensor needed to be made longer. The input from them goes into the back of a jersey or jacket rather than a computer at the top of the stem. It is a greater distance. So I broke out the heat shrink tubing and went to town. I have a 100′ spool of the stuff lying around — it was such a great deal, I couldn’t resist — and thought this would be a perfect use for it. As it turns out, there is a limit to how far you can push two wires through a single piece of heat shrink tube, but with two pieces of tubing I got the job done nicely. (The ability to extend power cords may be my favorite hacking trick thus far. I feel like the world is at my fingertips.)
The ribbon cable, by contrast, needed to be significantly shortened, so I cut it and crimped on a new connector.
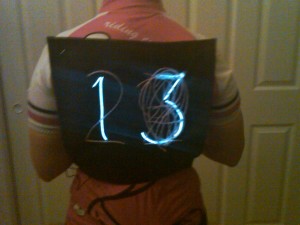
Sherri did a beautiful job sewing, and one day turnaround no less. As a quick test, I attached the vest to a bike jersey and used the wheel sensor magnet to generate a reading:
The only thing left to do is to take the vest out on the bike! I am planning to do this on our next Thursday night ride.
UPDATE: Some people have pointed out that in this photo, the corners seem very sharp. This is due to the very hasty safety pin job I did, it had been a long day and I just wanted to get the picture. The vest is soft and can match the rounding of my shoulders when attached properly.

