Coasterbot moves!
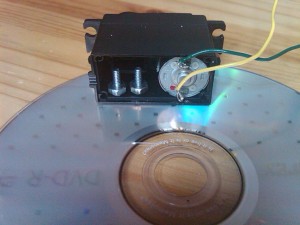
With the electronics done, it was time to go back and work on the chassis. As before, the DVDs are linked with screws. I wanted the servos to be firmly attached. Since we removed the controller units, this left a lot of empty space in the case, allowing for this type of attachment:
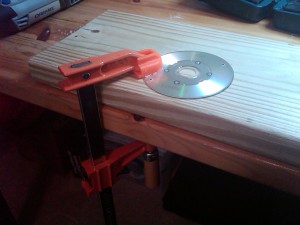
I still don’t have a real drill press (sigh) but I did get some extra pieces of wood so that I could make things a little bit more precise.
After attaching the servos, I decided to follow the steps in MAKE: The one hour coasterbot in order to move things along. This meant sticking things on with foam tape, a good method at this point as I may make position changes depending on the art that gets added. I wired up the solderless breadboard with the voltage regulator, Ardweeny, and H-bridge L293D chip exactly as described in the article. I also downloaded their Arduino sketch, which makes the robot perform a set of maneuvers. My body structure is a little different, keeping all the electronics on one CD rather than two.
Now, time to make the bot move! At first, this went pretty well. When I switched everything on, the robot started its pattern of movements, as defined by the sketch. But after a few minutes, the wheels started to move more slowly. Then they stopped moving backwards. Then, they completely stopped.
At first I thought this was a battery issue. After trying multiple sets of batteries and testing the output voltage, it became clear that wasn’t the case. Each time, the same thing happened. If I walked away from the bot for a long time, it would work again, then stop working.
A tip in the MAKE forums suggested that I look to see if anything was overheating. Something was — the L293D chip. This is an H-bridge, used to drive the motors. Typically DC motors need to have a voltage applied across them to make them move. To make them go in the opposite direction, the sign of the voltage must be reversed. H-bridges provide this capability in a convenient package. Since this one was overheating, I thought there might be an issue with current being overdrawn. Hooking up the motors directly to a power source, I could see they were drawing 150mA apiece, or 300mA total — even with no weight on them — while the L293D is rated for 500mA.
I decided to remove the wheels altogether. Suddenly the motors were turning a lot more rapidly, and the current draw was down to 70mA each. Turns out that the wheels were too far in on the very short coupler shaft. When the shaft turned, the wheels rubbed against the side of the case, causing extra work for the motor. Servo motors generally deal with precise placements and don’t worry too much about friction. For continuous motion, however, that quickly becomes an issue. I loosened the screws to move the wheels out a bit, and then the coasterbot was able to do a fast little dance, as shown in the video below.
The two “tail” DVDs can rotate with respect to the main body. Since this pattern goes clockwise, the tail is curved that way throughout. I haven’t figured out what their functional purpose will be yet, but if nothing else they provide extra surface space for instrumentation or loads.
Next up: add some sensors so that the robot can navigate the space on its own. I have a PING))) ultrasonic sensor (used to measure distance from objects) as well as a mounting bracket, and a servo motor to point it in different directions.

