Posts by Erica:
Finishing up the coasterbot electronics (mostly)
After building the Ardweeny, and modifying the servo motors, there was only one major bit of soldering left: the breadboard voltage regulator.
The Ardweeny requires an input voltage of exactly 5V, a common requirement for many chips. This is solved by using a voltage regulator. This is available as a simple component ($1.59 from RadioShack) but for best results you need to add capacitors and so on. Solarbotics makes a nice kit that gives voltage regulation to both sides of a small solderless breadboard, has a switch, and allows for adapter input as well as a battery. This was included as part of the Jameco bundle I started out with.
Putting this one together was pretty straightforward. Some soldering and that was it. The instructions suggest adding the male header pins by seating them in the breadboard first then putting the board on top of them. This was a clever idea that worked well.
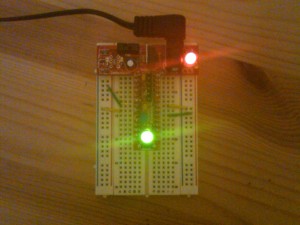
To test, I plugged in an old adapter that was too flaky to be used for its original purpose. The regulator converted it into a steady 5V. Here you see the regulator circuit at the top of the breadboard (in red) and the Ardweeny hooked up to it running vertically, happily blinking green.
The circuit has a serious time constant built into it. Presumably this is to reduce electrical noise. When the power is switched off, it takes several minutes to get down to 3V. Clearly, you don’t want to rely on the regulator switch for fast cutoffs.
This wraps up most of the electronics for the project, other than connecting wires. The H-bridge chip, used to control the servo motors, does not require soldering. The next steps involve working on the robot body, then programming.
Spinning our wheels
We need a way to make the coasterbot move, and without getting too exotic, this means adding some wheels. And some motors to make them turn. The Jameco bundle includes two Hitech HS-322HD servo motors. Once again, this was all new to me, so I did some reading. Servo motors are used to precisely position […]
Ardweeny adventures, part two
I have a working Ardweeny! The Solarbotics replacement kit arrived this afternoon. I assembled it as before, with a few differences. The male programming headers were put in with the proper orientation. And I decided to test the Ardweeny without soldering the chip in at first — the pressure of the outer pins holds it […]
Ardweeny adventures, part one
The parts bundle for the coasterbot includes a microcontroller to act as the brain of the robot. It is an Ardweeny, made by Solarbotics. Billed as the “smallest, handiest, bread-board friendly Arduino-compatible”, it literally fits on the back of the ATMega328 chip. It’s a pretty cool design, and incredibly small, as you can see in the […]
Constructing the DVD chassis
I was pleasantly surprised to find that my blog of the coasterbot build has been featured in MAKE: Robot Build Dispatch #5. Fortunately I have been working on the bot, so I can add some new material. For this installment I’ll continue discussing the chassis design. As described in an earlier post, I want to […]
Testing coasterbot construction ideas
The definining feature of a coasterbot is that its chassis relies on CDs or DVDs. Most of the ideas uploaded to the MAKE flickr coasterbot pool have a robot with one CD, or two of them stacked vertically. There is a good reason for this. A small footprint allows for a more agile robot, and […]
Entering the MAKE coasterbot contest
MAKE Magazine has created a contest to make a coaster bot. The basic rules are pretty simple: Contestants will build “CoasterBots,” mini robot development platforms, made using CD/DVD media as the main body components (“coaster” being slang for a dead/damaged CD/DVD). Your goal is to create a CoasterBot that can navigate a space on its […]
Speed Vest on the road!
The Speed Vest went for its maiden voyage today. The video below shows me riding it at night outside my house. If you can’t see the embedded video, here is the direct YouTube link. For the record, I can bike faster than 6 miles per hour, but we had to work around the limitations of […]
Finishing touches for the Speed Vest
With the electronics complete, there were only a few steps left to finish the Speed Vest. The digits had been sewn into a large piece of black denim cloth. It was now time to put this in a more attractive shape. After some consideration I decided to go with a trapezoid, as the original authors […]
Boxing up the Speed Vest
The original MAKE article on the Speed Vest was cavalier with respect to the packaging. The authors state that they simply threw the parts into a small soap box. They also mentioned that the electronics kept getting accidentally ripped out and had already needed to be redone three times. It seemed like some improvements were […]
